Saturday, November 16, 2013

adapt


This past month has brought with it some profound changes
and I've taken my grief and frustration out on my table
the underside has been left in a very raw state
I want to remember this month every time I touch it


cross-grain scrub planing leaves tell-tale texture
but I needed the edges to be smooth
using a block plane I transitioned the underside from the edge in
it offers an extraordinary tactile  experience


to get everything crisp and even requires moving around
a lot
lines change when you change position, the faces interact
and if they are not perfect huge wiggles happen


I could work these edges for another week, but I'm not gonna


except for drilling the round mortices for the base connection the top is done
it needs a few coats of polyacrylic but I can do that anytime

the next step is to get hauling on the base
that means big walnut
and some complicated joinery I have yet to figure out


for no good reason other than being fed up with the beige wallpaper peeling off my walls
I took a week off and ripped, patched and painted the future home of this project


Goodbye, sweet SE

Friday, November 1, 2013

change


the turning of the seasons never fails to evoke far more emotion than I am privy to display in public
this has been a year of heightened emotions as it is
my therapy (escape?) is documented here on these pages

my hours at work have dried up here near the end of the year, so I have a great deal more time to devote to my shop
the weather is still warm enough to glue and finish, yet not too warm to plane
a couple long days with the smoother revealed a distinct problem with this slab
the spalting which gave it so much character would be its undoing
there was no way to avoid tear out of the powdery figure
I tried every plane
tuned each up for a second go
tried scraping
tried sanding
nope

so I did the next best thing
filled it in


 my grain filler came out far too cool, so a dab of dye was called for


after a good sand a couple coats of oil urethane were wiped on to seal it all up
the underside was cleaned up and sealed as well
time to move on to the ends

I've spent a couple months now watching these pieces move in relation to one another
and I'm sure I have all the proper clearances worked out
I drilled out the ends first


positioned everything, using the auger bit as a awl to mark the tenons
and made a point on either side of that mark
you'll notice I've moved the starting point about a 64th of an inch towards the slab
this will create a draw-bore effect to tighten the seam


 drill them out one at a time


and chop the waste between


the center tenon and peg on each end will just have a hole, not a slot, this is the single anchor for the ends
it is the only part of the joint in which the mortice and tenon will be glued
for the others the bottom of the hole in the end gets glue and just the top half inch of the peg before its driven home, ensuring no glue gets into the slot

you've seen pegs get made before, but it is a nice shot


give them a day to dry and we'll move on


Sunday, October 13, 2013

point of no returns


I guess by now you realize this will never turn into an educational diatribe on the essential tenants of wood working

I'm figuring if you've stayed with me this long, haven't grown tired of my repeated ramblings, my photos of tools old and new in all sorts of uncompromising positions, my occasional profanity
then I'm doing pretty well. And that by now you've learned enough of the essential tenants that I don't have to digress, and the long winded linear sequitur is already apparent.

I bring to you a short continuation of the essay begun last post

how to make breadboard ends:


 step one: cut the wood


step 42: chop the groove and mortices

oh wait..
did I miss a couple steps there

yea, sorry I did,

there's just too many things I do every day in the shop I don't even think to take a photo of

so yea, step 2: cut the wood the other way

step 3: cut the wood the last way

step 4: have fun planing for the next few steps

step 22: I'm pretty sure a beer is one of the steps about now

step 23: check everything you planed before you had the beer

looks a hell of a lot better doesn't it?

step 37: make your marks

moving on...


the cheapest tool I currently use, I think I spent five dollars on this, the blades cost more
my review: hey it works, in fact it works great, in fact the fact that it is butt ugly, cost five dollars and works great makes it one of my favorite tools!


step 204: test fit for the twelfth time then use a rasp, plane or pig sticker, whatever it takes, to get it right.


 step 367: can I get a hell yea!


step ok I'm starting to loose count, the ubiquitous overhand rip,
I did this both towards and away from my body, depending on the corner being ripped


scribe, this is the simplest way to mark a big bevel


then of course, plane, set for big cuts, this is tough work but it moves fast


soon they're even


at the end of the day, it's amazing to realize the progress


OCD is not a disorder


Saturday, October 5, 2013

full circle


here we are
back where I was almost four years ago
three BIG slabs of maple
I did the cove on the underside of one slab this spring
then the weather got too warm to plane responsibly
and my idea of torture moved a couple notches in the wrong direction

 
obviously the weather has returned to a much more suitable demeanor
and other obligations have been upheld
I checked the inventory and found there to be an ample supply of lumber on hand
the table has once again won my affection

the idea was to preserve as much lumber as possible
that meant cross cutting for depth every inch from the ends and chiselling out the waste
near the center there was enough material to then resaw and end up with a small panel
and I managed enough thin pieces for a few drawer bottoms later on
it was the middle slab that worried me
it was joined from two short lengths by a mighty little joint I kinda made up on the fly


I worked all the way down to it but was scared to cut it all the way off
what if the joint failed?
this three year stint was screwed!
I'd thought about leaving it till the glue-up, then cutting it off later, but it was seriously in the way


taking the plunge I removed it and thankfully no fail happened this week
the coved slabs were jointed


 the ends made perfect


and the whole reason I bought the best damn panel saw I could find
yes, that's Andrew's saw, whole and unscathed as was the fear of a couple readers
these cuts are fourteen inches of the hardest freakin maple ever
and this saw does just what it should
the kerf runs true from the far end to the near, just keep moving yer thumb
the saw never jumps, and makes its own new kerf
just plows on through, completely predictable
and it's funny because this thing is so flexible, it feels like it shouldn't cut as straight as it does
when it's done with a cut it rises forth and sings for a good two seconds each and every time
spooked the crap out of me the first couple times


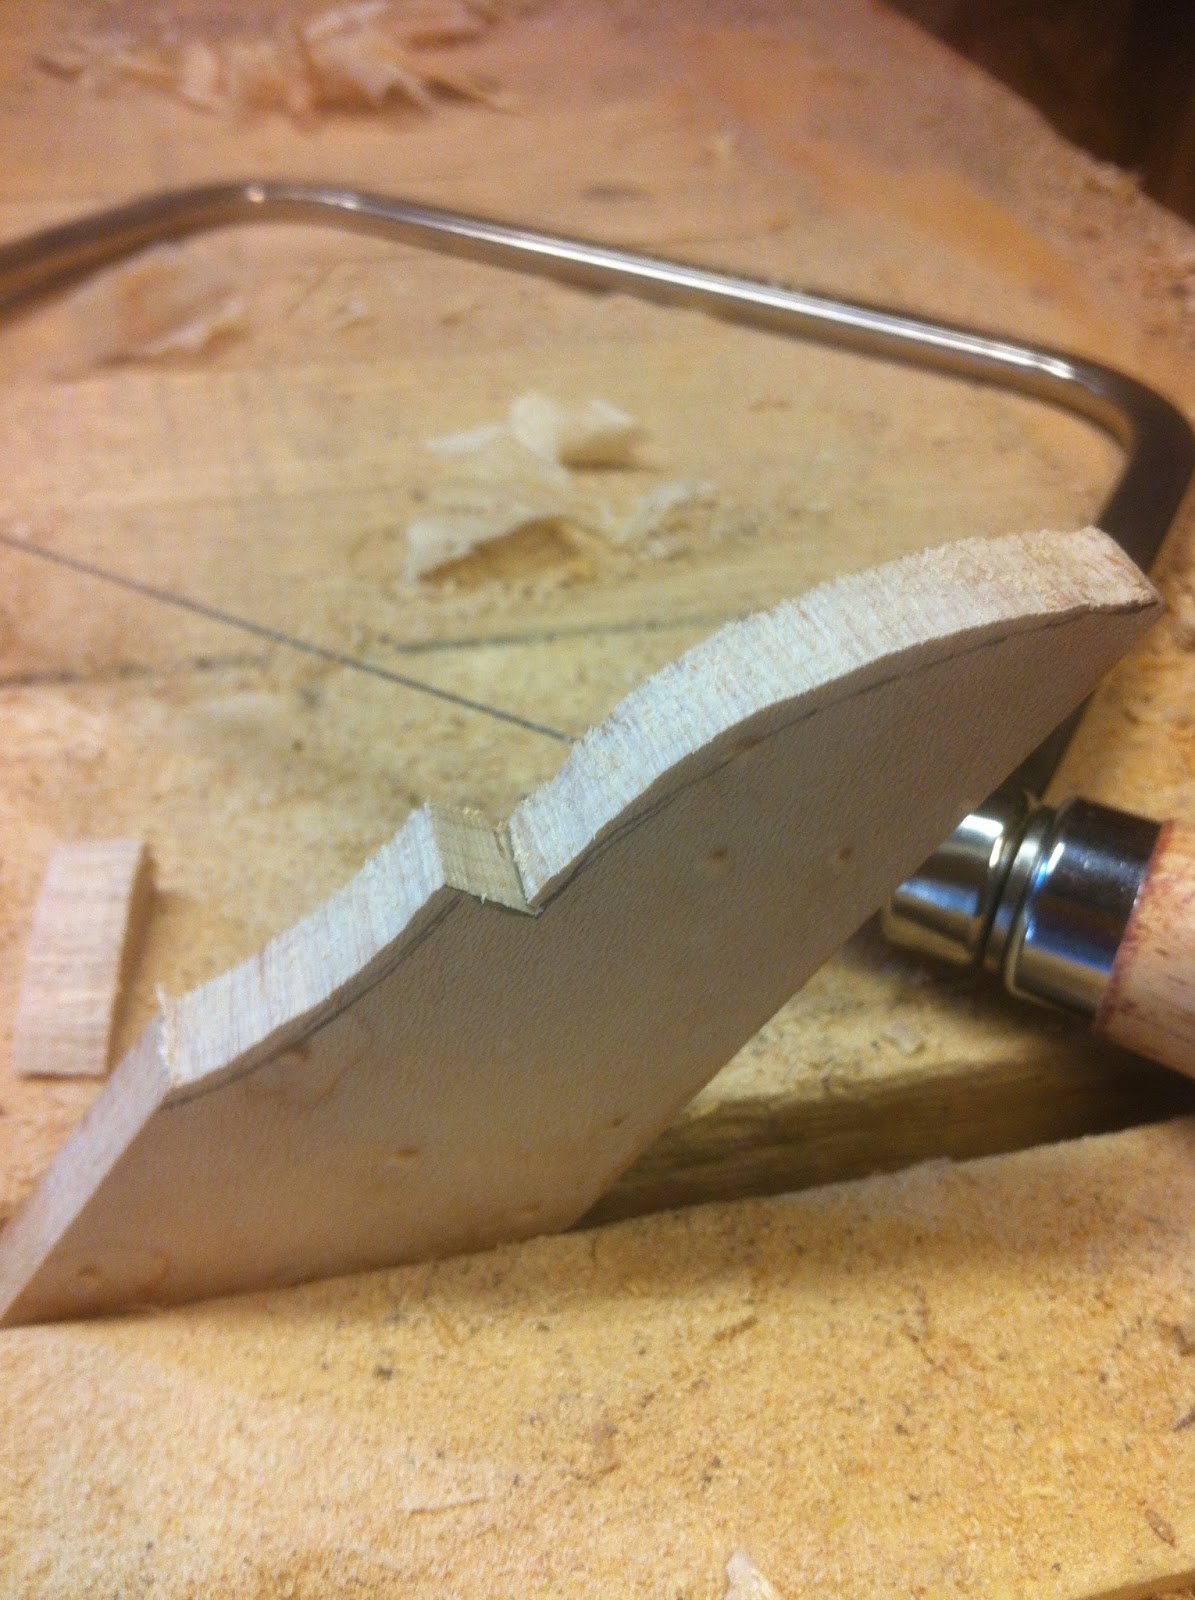
chisel the waste and follow with a shoulder plane
it will be months before I find all of the chips from twelve tongue and tenon shoulders

I had to get creative when it came time to bring these giants together
the whole is bigger than my bench, but just as heavy
clamped to the assembly running the center of my shop, it acts as it's own bench
and I can work all sides


just checking the whole setup before glue
and it's a good thing, when I clamped up, the left slab cocked at a frightening angle
back to the bench, the clamps and a couple different planes
jointing is an art, and I have just the slightest inclination of how to do it right
on the second dry run, however,  it came up perfect


 glue, clamp, wait


and then the fun really begins!
missing above is the most important plane, the scrub
try not to worry about leaving big scrub tracks, they plane out later
eight hours of labor, three inches of shavings, three meals, and a couple beers
this top is flat!

Saturday, September 28, 2013

learn


a lesson in poor saw handle design


I created this saw handle thinking how cool the lines were

how it hunched up over the blade
kinda Klingon
and it never worked right
I relaxed the teeth along the first quarter
but it always jammed hard two thirds into a cut

then three nearly simultaneous occurrences took place

an article in PopW about hang angle
the arrival of one very special new member of my team
and a nice piece of wood


the article spoke of the, now that I think about it, simple geometry that makes a saw work well
from what I could surmise of the article, your index finger points directly to the sweet spot
the center of force
I had never considered that the angle of the dangle could be off
and off it was


I took a chance on the Eb
and won the nicest piece of history I can imagine
an Andrew Lunn panel saw, totally eccentrically left handed
I set it down to test its side to side balance
when it eased forward on its own
all 22.5 inches of its length
and bit a kerf across my bench


the nice piece of wood was just that
an off cut from a previous project, very little future otherwise
a quick cursory glace placed the shape in perfect unison with the twisting grain
I'm sorry for the lack of photos, this was a quick day and a half of shaping


the angle is just right
I tested it, I know
and it makes all the difference

Monday, September 16, 2013

anarchist


 thanks Mr. Schwarz
you've seriously done me in this time


 I got it into my head that I really needed just a small project to bring me out of my slump
no matter that I just did a ninety hour work week and would see a sixty on the near horizon


 forty year old  birdseye maple
they were making window framing out of this back then
it could not just end up in the dumpster


 I can get two squares from this piece
only two


 I decided to go for the original design; mortice and tennon
and I had recently acquired an eighth inch sash mortice chisel


 hmm, maybe antiques aren't all up to snuff


 I braved through the rest with a bench chisel and can say it's not nearly as much fun as it is with a pig sticker


 yup, that looks like anarchy to me


 simply planed this wood is stunning, the figure is tiny and abundant


 and I'm trying to learn all my molding profiles